
My friends and I love to play tabletop games. Some games you end up with several cards to hold onto and keep track of and are always shifting through cards. This would also work well with children with small hands or seniors. After searching Pinterest, I found a few different patterns, but they were all in GERMAN. So, after trying to convert the instructions from German to English, I went off the basics of their instructions and made a few adjustments. These days I’ve been a big fan of just “winging it”. So, for those of you who would rather not just wing it, or are looking for English guidelines on how to construct these handy playing card holders, here is a pattern. I haven’t written up pattern instructions before, so if you see anything that seems odd, message me in the comments and I will clarify or update the instructions.
You can download the PDF of the tutorial here: Playing Card Holder
Just to throw credit out there. The pattern that I based this off of, was from Nicole Voigts at BASTELdeern (Craft Lass) .
What will you need?
You will need fabric for the outside, inside background, and the pockets. You can use all the same fabrics, or mix and match. This could even be a fun way to use up some of your scrap fabrics. You could make it with 3 Fat Quarters. Just depends what you are looking for. For this project, I used 3 different patterns (one for the outside, one for the inside, and one for the pockets)
Supplies:
- (2) – 17.75 x 12-inch fabric (One for the outside and one for the inside)
- (2) – 17.75 x 12-inch woven interfacing (One to iron to the back of each the outside and inside fabrics)
- (5) – 4 x 12-inch fabric for the pockets
- (1) – 12 x 18-inch Sheet of Ultra Stiff Plastic Canvas (you can find these in local craft stores – Joann Fabrics has them in the Cross-Stitch aisle)
- Snaps or Velcro (Read section on “Snaps or Velcro” before making your decision/purchase – page 12 of pdf)
- Coordinating thread
- Sewing Machine
- Basic Sewing gadgets (i.e. pins or clips, cutting mat, ruler, etc.)
Instructions:
First things first iron the fabric (this will make it easier to get an accurate cut) … then cut the fabric.
- 75 x 12 inch from the main outside fabric
- 75 x 12 inch from the interior fabric
- 5 pieces that are 4 x 12 inch for the pockets
- 2 – 17.75 x 12 inch from the woven interfacing
- 5 – 2 x 12 inch from the interfacing (OPTIONAL)
Note: If you want, you can use interfacing for each of the pockets – but this will make it thick when you are sewing the main pieces together. I have done it both ways … It’s not necessary … so if you don’t want to test the limits of your sewing machine you can go without it for the pockets. IF you chose to add it, you would need 5 pieces of woven interfacing that are 2 x 12 inches. For this tutorial, I will be adding the interfacing to the pockets. If you don’t want to, you can skip those steps.


Prepare the pockets
Repeat the below steps for ALL 5 of the pocket pieces. When I made mine, I did one step for each of them before moving on to the next step. That way all 5 were done at the same time and I wasn’t going back and forth between the sewing machine and iron.
If you are adding the woven interfacing to the pockets, iron the interfacing to the pocket pieces as shown above. It should cover ½ of the fabric, matching up with the edge. Use instructions provided with the interfacing to attach to the fabric. (If you are not adding the interfacing to the pockets to reduce bulk, skip this step)


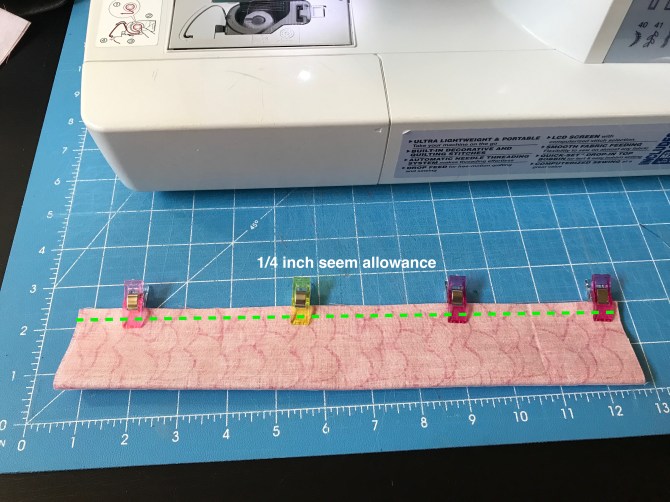
Fold the pocket fabric in half, right sides together, so it measures 2 x 12 inches. Pin or clip the edges together so they don’t shift.
Then sew along the long edge with a ¼ inch seam allowance.
Then turn the pocket right side out. Iron flat so the seam is at the bottom and folded edge is at the top.
Once ironed flat, top stitch the folded edge with a 1/8 inch seam allowance.


You should now have 5 “pockets”. Set these aside for now.
Prepare the Outside and Inside Fabrics
Next attached the woven interfacing to the back of your 17.75 x 12-inch fabric (using the instructions that come with the interfacing).


Sew Outside and Inside Fabrics Along Top Edge
Once you have a piece of interfacing attached to the back of your outside and inside fabric, place them on top of each other, right sides together and sew a ¼ inch seam along the 12-inch edge (sorry I forgot to get a picture of this). Once you have them sewn together, it should now measure 35 x 12 inches.
Fold the seam open and iron flat. This will make it easier to sew later.
Add the Pockets to Inside Fabric
Lay the 35 x 12 inch fabric flat, and measure 8.75 inches from the seam and pin the first pocket into place. With the Top-Stitched side of the pocket closer to the seam. Sew along the bottom edge of the pocket to attach it to the inside fabric piece.

For the 2nd pocket, measure .75 inches from the top of the previous pocket, with the top-stitched edge facing the same direction as the 1st pocket, pin into place and sew along the bottom edge. — Repeat this step for the 3rd, 4th, and 5th pocket. Each one being .75 inches down from the previous.
For the 5th pocket, use a zig-zag stitch along the bottom.

Once all 5 pockets are attached, measure half way across, and did a zig-zag stitch up the middle of the pockets to divide them in half. You Should now have 10 total pockets like this:


Sew Sides of Outside and Inside Fabrics
Now we are going to sew the sides of the outside fabric and inside fabrics together. To do this, fold the fabrics so they are right sides together. This will make put the pockets between the two fabrics.
Sew along each long side with a ½ inch seam allowance. I do a ½ inch for this seam because, it ensures that all of the pocket edges get sewn together on the sides.
To reduce bulk at the edges, trim off some of the fabric but make sure not to get too close to the seams. Also, trim the corners without cutting the stitches. This will make the edges of the card holder lay flatter instead of being thick and bulky.


Then turn the card holder, right side out. Use a knitting needle, or Pen to push out the corners.
Now Iron so both the outside and inside fabrics are flat.


Prepping the Plastic Insert
This plastic canvas can be found, generally, in the cross-stitch aisle at local craft stores (I found this at Joann’s).
Cut Plastic:
- 2 pieces at 5.5 x 10.75 inches
- 1 piece at 2.5 x 10.75 inches


Inserting Plastic Inserts
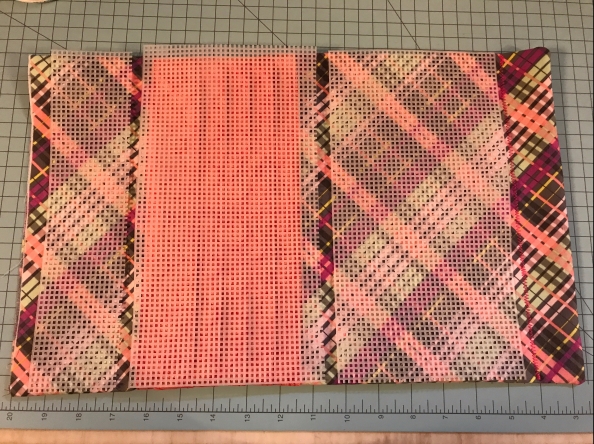
The above photo shows where the plastic pieces will lay inside the sleeve.
First sew a seam with a Zig-Zag stitch 1/5 inch from the top seam.

Then Slide one of the 5.5 x 10.75 inch plastic pieces into the sleeve so it meets the zig-zag seam you just made.
Note: If you find that the canvas is a little too wide (seams might not have been sewn at ½ inch or using thicker fabric can cause this), remove the plastic piece and trim a little off the side, until it fits without bending. It should lay flat.

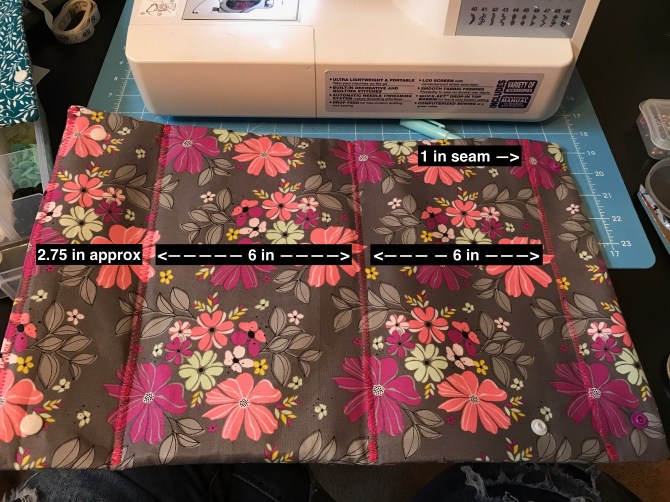
With the plastic piece in place, make your next zig-zag stitch 6 inches from your previous seam, This should enclose the plastic piece between the two seams with a little extra room to make it easy to fold at the seams. This stitch should be about 1 inch from the top of your first pocket.

Next take your 2nd 5.5 x 10.75 inch piece of plastic and insert it in the sleeve so it meets the stitch you just made. For this plastic piece, I had to trim off the edge, because of the extra fabric layers from the pockets at the seams. Don’t be surprised if you have to trim this plastic piece to make it fit flat.
To enclose this piece of plastic, make another zig-zag stitch 6 inches from your previous seam.
Then take you 2.5 x 10.75 inch plastic piece, insert it into the sleeve so it meets the previous stitch. After inserting the piece, fold the edges of the fabric in, and zig-zag stitch close to the end of the fabric. Make sure to fold the fabric in far enough so you are stitching just past the plastic piece, leaving only a little wiggle-room for folding the card holder.
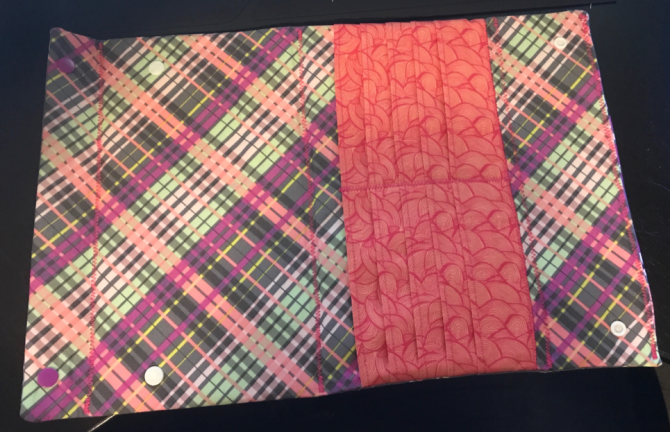
Back (outside)
Front (inside)
Snaps or Velcro?
To have the Card Holder stand up-right, you will need to use something to connect the ends so it forms a triangle. The original tutorial showed them using sew-in snaps after the card holder was assembled. You could also use plastic snaps (like I did), or you could use velcro.
If you use sew-in snaps … this can be done at the end after it’s all sewn together.
If you use Velcro … If it’s sew-in Velcro (which is what I would recommend if using velcro since adhesive Velcro tends to not stick after a while), then you will want to attach part of the Velcro BEFORE you sew the long sides together, and part at the end to line up with the first piece.
For this tutorial, I used plastic snaps. You will see some are purple and some are white. That is because for some reason the purple didn’t hold as well as the white did.
Snaps:

You will need 2 female snap sets, and 4 male snap sets (OR 4 female and 2 male).
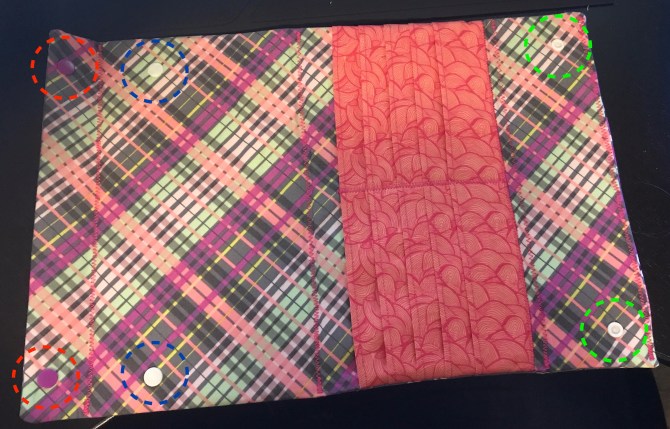
In the photo above I have the male snaps circled in RED and BLUE, and the female set circled in GREEN.
Make note of the direction the snaps are in. When looking at the inside layer, above, the female (GREEN) snaps are facing up, and the male (RED and BLUE) are facing the back of the card holder.
Start by inserting the female snaps (GREEN). I placed them so the middle of the snap was 1 inch from each edge. Use the instructions that came with your snaps and pliers on how to attach the snaps. You will put the pin through the back fabric, the plastic canvas (through on of the holes) and the front fabric. You may need to apply a lot of pressure to make sure it connects properly, or tighten it a couple times.

Then – Add the first set of male snaps (RED). To do this I folded the stand in the position it would be in when using it.
And place the male snaps so they line up with the female snaps. On mine, they ended up approx. 1 inch in from the edge, and .5 inch from the end. Depending on where your stitches ended up , this may be slightly different on yours. That’s why I recommend lining it up instead of measuring.


Then add the second set of male snaps (BLUE).
To line these up fold the 1-inch section, onto the section next to it. Then fold that section onto the section that has the pockets.
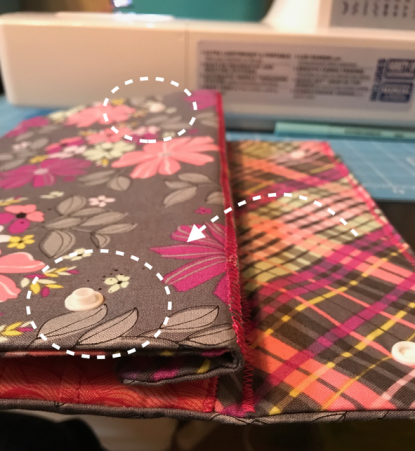
Then fold the flap with the female snaps onto the other layers. Use the locations of the female snaps to determine where you should put the last set of male snaps.
Depending where your seams ended up, the locations for yours might be slightly off from mine. The center of the male snaps ended up approx. 1 inch from the edge and 1.5 inch from the seam.
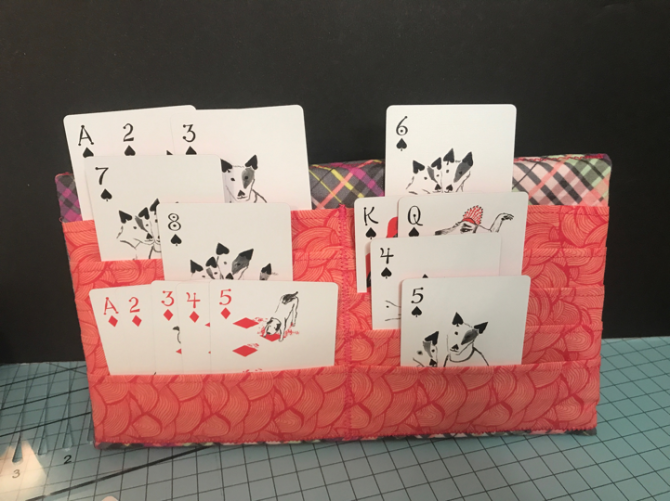
Ta-Da!!! You’re done!!! Grab a game, grab some snacks, and your friends and family and have some fun! Below are pictures of three different ones that I made.


Thank you for the tutorial. I am making something similiar but more like a tee pee shape. I used magnets instead of snaps/velcro. magnets were glued to the insert piece that makes the the triangle part so when done they were underneath the fabric and not exposed
LikeLike
Magnets! That’s a great idea!
LikeLike
On Pinterest someone notice an error on the measurements. It says 17.5″ for ea front and back sections.
But in the main explanations it says 75X12″ for ea the front and back. So is there an typo on the instructions?
Thank you.
LikeLike
Hello! Thank you for asking and bringing the error to my attention. Both the front and back fabrics should be cut to 17.75 x 12. Can you tell me what page in the instructions say 75 so I can fix it?
LikeLike
The very beginning of your instructions.
It’s where you start to explain
INSTRUCTIONS
Sorry it took me so long to answer you. I just got your reply.
I guess the mail on WordPress is really snail mail. Lol
LikeLike